|
|
|||||||||||||
|
If you find this site useful and would like to make a donation to help towards the running and development costs please click on the button below:
Thank You !
|
|||||||||||||
|
|||||||||||||||||||||||||||||||||||||||||||||||||||||||||||||||||||||||||||||||||
|
Welcome to the VW Camper Van Bay Window T2 Buyers Guide
VW Bay Window Buyers Guide General I have written this guide as an aid to anyone who is thinking of buying a Volkswagen Bay window camper van (also referred to as T2 or Type 2 Camper). Obviously there are different model versions depending on the year as well as different conversion companies such as Danbury, Dormobile, Devon, Viking and Westfalia so some of the information will apply to some campers and not to others. Some of the information mentioned is general and would apply to any vehicle but I will try to highlight issues that are specific to VW type 2 campers. Also when checking a bus be realistic as you cant expect a cheap van to be totally free of faults. The idea of this guide is that it will help you make an informed decision highlighting any problems that exist so that you know exactly what you are buying. You can decide if the camper is worth the asking price and also if you can point out any problems to the seller it can give you a basis for price negotiation. Some of the information is based on my own personal opinion and you may not agree so feel free to e-mail me and let me know. I am also hoping readers will e-mail me with any useful advice that I can add to the site for the benefit of others. If you find the site useful please consider making a small donation to help pay towards the site running and development costs by clicking the Paypal button on the left (You don’t need a Paypal account to make a donation) ;-) When going to view a van at the very least try and take someone with you that knows about general mechanics and bodywork. If at all possible take someone who has experience of Volkswagen campers. If you don’t know anyone see if there are any VW Owners Clubs in your locality and ask if someone in the club will come with you, as it really helps to have a second opinion (and pair of eyes!) especially if they know about VW campers. When going to view a bus try to go on a dry day (not always possible in the UK!). On a wet day it is very easy to miss blemishes in paintwork and small rust bubbles. Also if the underside of the van is wet it can mask problems such as leaks from braking systems either from brake pipes, connections or from brake cylinders. These leaks would be noticeable as damp patches on the brake drums or on the floor underneath the van. Also if brake fluid or oil is dripping underneath the van it may not be as noticeable if the road underneath is wet. Unless you have welding skills I would suggest that you buy the best van you can afford paying particular attention to the bodywork. If you have to pay a garage for welding and respray work it can add up to a lot of money. Generally the initial quote will end up being a starting point as it is quite likely more problems will be discovered once work commences. Mechanical problems are generally easier and less expensive to fix and can quite often be done by yourself with the help of the appropriate workshop manual. When you do get stuck there are plenty of forums where you can post questions and get answers from other Volkswagen enthusiasts. Ask the seller of the bus if he has any service history, bills for work done, previous MOT’s (can help verify mileage) or any other documentation. Generally the more history that is available the better the chance it is a good van as it is a sign the previous owners have looked after it. Items that you will find useful to take on a viewing include a torch, a mat to lie on, a magnet and thin cloth, small step ladder and a cloth or tissues to wipe oil etc.
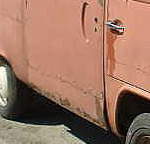
Bodywork Introduction The Type 2 Camper that you will be looking at is going to be anything between 30 and 40 years old so unless it is imported from a so called “rust free” country there is a good chance that it will either have been restored or is going to have rust issues. Just because a bus has a nice shiny respray does not mean that it has been restored properly so sometimes it is actually better to buy a bus that hasn’t been resprayed so that you can see any problems before you buy it. If buying a restored van ask the owner if he has photos showing the van before and during the restoration. Most people and garages restoring vans take photos so that you can see the job has been done properly using new panels and minimal body filler. Also if the van was restored by a garage ask the seller if you can see any receipts to confirm exactly what was done. If the seller does not have photos and receipts you run the chance that after a few months ownership you will start to see rust bubbles coming through that nice paintwork where rust has been patched and disguised with excess body filler. If you suspect that any area has been filled excessively then a simple test is to take a magnet and check if it sticks to the area. Put a thin cloth such as a handkerchief between the magnet and the bodywork. Ask the seller before doing this as he may be worried about his paintwork but if he says no then it is quite likely he is worried about what you might find. If the bus has been filled then it can normally be spotted by standing at each corner of the bus stepping back slightly and looking down the entire length of the van. If you see ripples in the paintwork then there is a good chance that there is filler underneath. The first place to check a bus for rust is underneath. Most of the structural bodywork that will be the difference between passing and failing an MOT ( and a second mortgage for welding repairs!) can be seen by viewing the underneath and bottom 6 inches of the van. When going to view a van take a torch and something to lie on. Wear old clothes that you don’t mind getting dirty and you will be able to have a proper look rather than a cursory glance. Main Chassis Rails, Jacking Points, OutRiggers and Floor
If possible try and view the underneath of a VW bus using garage ramps so that the van can be raised to a comfortable position. If the seller cannot provide these facilities maybe you could have a word with a local garage and offer to pay him a small fee if he will let you use his ramps for fifteen minutes or so. Otherwise you will have to crawl underneath which isn’t too easy especially if van has been lowered. When looking at the underneath of the van you will see two box chassis rails running from the front to the back of the van (one on each side.) These rails are what give the bus its strength and should be free from any rust. If any area looks rusty you can tap and poke it with a large screw driver and you should be able to tell if it is solid or not. Sometimes patches have been welded to replace rusty areas. If any area of the chassis rail has been patch welded check the quality of the welds and also check that the patch has been welded to good metal all round. The next parts of the underneath to check are the jacking points. There are 2 jacking points on each side. Underneath the van just behind the cab area and just in front of the rear wheel. These jacking points and surrounding area should be solid and rust free. It is quite common for these jacking points to be so rusty that any attempt to jack up the van using a scissor jack results in the jacking point collapsing which is obviously dangerous for both you and your van. The next parts to check are the outriggers. The outriggers are the metal strips that run at ninety degrees to the chassis rails. The outriggers run from one side of the bus to the other. The outriggers also form part of the main strength of the van and should not be rusty. Check also that the welds and surrounding areas where the outriggers are fastened to the van are solid and rust free. The floor of the rear cargo area is the next place to check. Look from underneath for any holes or rust problems. If the van has a camping interior fitted then it may not be possible to view the floor from inside the van (unless it is possible to lift carpet or lino) but you should be able to lift up the rock n roll bed seat base and check around that area especially around the rear seat belt mounting points. Any rust within 30 cm around the seat belt mounting points will be an MOT failure.
Inner and Outer Sills
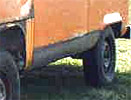
The sills are the panels that run horizontally along the bottom of each side. The construction consists of an inner and outer sill. These are part of the structural strength of the van and any corrosion will result in MOT failure. Look for rust and if covered in underseal check carefully for filler using the magnet and also prod with a screwdriver if in any doubt. Sometimes patches have been welded to replace rusty areas. If any area of the inner or outer sill has been patch welded check the quality of the welds and also check that the patch has been welded to good metal all round. Front Beam The front beam (another name for the front axle) is another structural part that will fail the MOT if it is rusty. Situated under the cab area it is the metal assembly to which the front brakes, suspension and steering parts are mounted to. Have a good look underneath from all angles possible and don’t be afraid to tap with a screw driver to check any areas that look corroded. If the front beam has had any welding done it should be seam welded meaning that the patch must be welded continuously all the way round and not just equally spaced spot welds. Be aware that this is a bit of a grey area and some MOT examiners may fail the van if there is any welding on the front beam. Front Panel
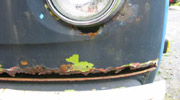
Look for rust in the front panel around the windscreen. The most common place is at the base of the windscreen in the corners. Generally if allowed to develop this can lead to water ingress into the van causing rust in any area that the water can build up such as the base of the front panel or the cab floor. Water can also drip on to the fuse box leading to corrosion of the contacts and related electrical problems. Also check for rust at bottom of the front panel, behind the bumpers and at the bumper mounting points. The front panel is also susceptible to stone chips that can develop into rust patches if left untreated. If the spare wheel is attached to the front it might be an idea to remove it and have a quick look behind as water can become trapped behind the wheel and cause rust problems. Also check around the wheel mounting bracket that everything is solid. Front Wheel Arch and Cab Floor
Examine the front wheel arches from underneath and then open the doors and check the inside. Check for filler all around this area. Look for any rust around the front seat belt mounting points as any rust within 30 cm of these will fail an MOT. If the cab floor area has a carpet or rubber mat then ask the seller if you can lift it up and check underneath as it can be hiding rust holes or bad repairs. Look for rust around the bottom step area as rainwater runs down the inside of the doors if the window seals are not good and travels down a ridge in the top of the wheel arch to the lowest point at the step. Drivers and Passenger Doors
Open each of the doors and check at the bottom for any rust. If drain holes at the bottom of the doors become blocked then rainwater can leak in through bad window seals and build up at the bottom rusting the door from the inside out. Check the operation of the window winder on each door by winding window from top to bottom and back as parts of the assembly can become rusty or worn causing problems. Check that door can be locked and unlocked using key (and plastic popper if later model). Ideally the same key should lock and unlock all doors including sliding door, rear hatch and engine bay. This is normally a good sign as it suggests the van hasn’t been messed around with too much. There should be a layer of polythene between the inside of the door and the door trim. Quite often this has been removed during a previous repair or when new door trims have been fitted. Check the bottom of the door trims because if the polythene has been removed water that would normally have drained out of the bottom of the doors can be absorbed by the panels which are made from thin hardboard. If the door trims are damaged it could also be another sign that the door bottoms are rusted as mentioned in earlier check. Open and close the door a few times checking that a solid slam closes it properly with each attempt. The hinges should be solid and the door should not drop when you open it. Check by applying light pressure that the door cannot be lifted when open. With the door closed check that the gap between the door and the rest of the bodywork is equal all round. Check the condition of the rubber seal around the doors as if they are not effective water can drip onto the floor causing damp carpets and rust underneath as well as a damp seat which isn’t very pleasant to sit on! Sliding Door
Check the sliding door from inside and outside the van for rust which will usually be at the bottom. If the rest of the door is solid it’s possible just to have a new door bottom welded on replacing the bottom few inches of the door skin. Obviously the costs of welding and respraying will add up but at least the whole door doesn’t have to be replaced. Next check the operation of the sliding door. It should roll freely and remain level when opening and closing. It runs on nylon runners that can become worn over time causing it to stick or sometimes it can even come of the runners if they are badly worn. Run it back and forth a few times. Also check the giude slot that the runner follows as this can become worn and allow the runner (and the door attached!) to fall out. When the door is closed it should fit flush with the body and the gaps between the door and the surrounding bodywork should be equal. If not it could be that the door is not adjusted correctly. Check that the door can be locked and unlocked using the key and also using the little lever on the lock mechanism inside the van.
Rear Wheel Arches
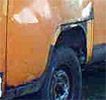
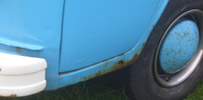
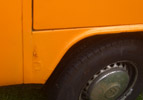
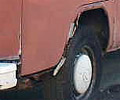
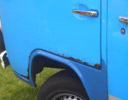
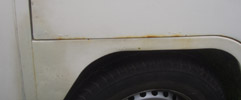
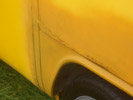
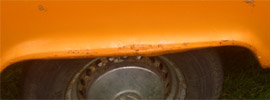
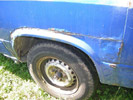
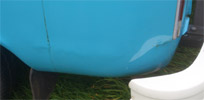
The rear wheel arches are another area that can be subject to rust. Look inside the wheel arch as rust can be found where underseal has peeled off and water penetrated. Also if mud has built up in any area rust can build up underneath. Use your hands to feel round the edge of the wheel arch and check if filler has been used to disguise any rust. Also check with a magnet if in doubt as this a popular area to use filler and underseal to hide any rust. Rear Corners And Battery Tray
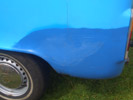
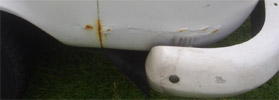
The rear corners and the battery tray are another area where water becomes trapped and leads to rust. As well as checking on the outside rear quarter open the engine hatch and check from the inside. Remember that it is essential that the battery is secure otherwise it is a safety hazard that can lead to fire as well as an MOT failure. Therefore it is important that the battery tray and the clamps that secure the battery are in good condition. If a leisure battery has been fitted on the opposite side of the engine bay check this also. Also check with a magnet if in doubt as this another popular area to use filler and underseal to hide any rust. There is a vertical seam between the rear quarter and the wheel arch panel but quite often if the area has been filled the seam is no longer visible. Rear Hatch and Engine Lid
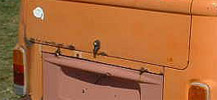
It is common for these to rust at the edges especially at the bottom and also around the locks. Check also that the rubber seals are doing there job otherwise if water leaks through the rear hatch it is going to cause rust and also damp in your rear cushion which apart from causing a mildew smell is also quite possibly where you are going to sleep at night! Check that the hinges and surrounding areas are solid and operate correctly. Check the locks operate using the key. If either the rear hatch or engine lid are rusted beyond repair it is possible to get second hand replacements imported from “rust free” countries. Don’t forget to budget for the cost of respraying as well though as the chance of getting one the same colour as your van is pretty slim! Roof Guttering
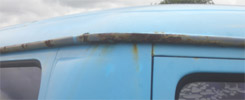
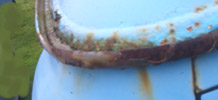
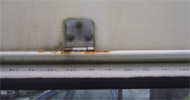
If the bus is a tin top or has a pop top that doesn’t cover the whole roof then there will be a defined gutter ridge all the way around the bus. In each rear corner there is a slot in the gutter to allow water to run out. These gutters can rust from the inside out and are quite difficult to repair and therefore costly. The main reason for the gutters to rust are when the van is parked up during winter. If the water outlet slots become blocked with dirt or leaves rain water cannot escape and sits in the gutter rusting it away. Also if the van is parked on a slope ie: with one side higher than the other then water can also build up in places and cause problems. To check the gutters, don’t just look at the outside, as unless they are really bad most of the damage will only be visible by getting a small step ladder and looking from above inside the gutter. Gutters can also become damaged and rusty if a roof rack has been used particularly if it has been left on for a long time so look out for this. Pop Top and Elevating Roofs
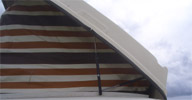
There are many different types of roof and each type has its own idiosyncrasies and weaknesses so ask the seller to demonstrate how the roof is raised and make the following checks: Check the structure of the roof ie if it’s made from fibreglass check it for cracks or damage. Check for leaks as this is where you will be sleeping and/or storing your camping gear and any moisture, damp smells or mould will make camping unpleasant. Check any hinges for cracks and rust and that their surrounding areas both on the van and on the roof itself are solid. Check that any lifting mechanisms are working and that the area surrounding the mounting points are solid. Check that the roof canvas is not ripped or rotten. Check any air vents in the roof are working, that they are not cracked and that seals are not leaking. Check that all roof parts are present as certain parts can be difficult to get hold off. For more information on camper roofs and where to get spares for your roof or even get a new roof fitted CLICK HERE to visit my other site. High Tops
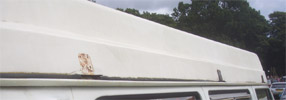
Check for cracks in the fibreglass and look for filler repairs especially where the roof could have been driven into something. If the roof has windows check that they are not cracked and that the surrounding seals are watertight. If the roof has vents check that they operate correctly (normally by turning a handle). Check that the vent and seal is watertight and doesn’t have any cracks in the casing.
Mechanical General When arranging to view a bus ask the seller not to run the engine till you get there if at all possible. Ideally you want to see the engine start up from cold. With the engine cold switch on the ignition and you should see the oil pressure and the alternator charging lights in the speedo light up. If standard the choke is automatic and is activated by pressing the accelerator once and the releasing before starting. With the van in neutral start the engine. The oil pressure light and alternator light should extinguish. The engine should run smoothly from cold so go for a drive and check that it continues to run smoothly and doesn’t stall. After taking the van for a test drive and performing the checks that are outlined below park up and after leaving the engine idling for a couple of minutes check underneath and in the engine hatch for any oil leaks. Most camper vans like to mark their territory by dripping a bit of oil on your path but this should be a small amount generally from the rocker box gaskets (you may see a small amount of oil on heat exchangers as these are directly below the rocker box covers). But any excessive oil leaks will require further investigation. Look under engine, gearbox and axles. Engine
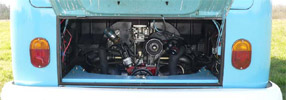
Firstly do a visual inspection by having a good look in the engine hatch. Check for oil leaks and inspect all fuel pipes are in good condition. Check that there is no smell of petrol as engine bay fires are not unknown and are normally caused by petrol leaks from old, damaged or loose fuel pipes dripping petrol onto a hot engine/exhaust and igniting. Facing you will be a large pulley which is the crankshaft pulley. Check that there is no oil leaking from the engine at the rear of the pulley as this would require a seal changing and is an engine out job. Take hold of the pulley and check there is no play by trying to rock it back and forward. If oil leaks from the engine it can build up at the lowest point of the tin ware. As the engine and exhaust gets warm the oil will begin to smoke and gets drawn into the fan and then into the heating system. You will smell this in the van and smoke can start pouring out of the vents which can be a bit scary if you don’t know what it is. Listen for any knocks coming from the engine as these can be due to something serious such as worn big end bearings or worn crankshaft. Get someone to sit in the van and increase the revs of the engine (or pull the throttle linkage on the carb if you know how) and check that there is no black smoke coming from the exhaust. Check the condition of the exhaust and the heat exchangers looking for any leaks. Check the engine is running smoothly as if it is running unevenly it could be running on only 3 cylinders. If you are not sure carefully pull a plug lead off at the spark plug end with the engine running and you should hear the engine note change and it will start running a bit rough. Replace that plug lead and pull of the next and so on. If you pull of a plug lead and the engine note doesn’t change then the engine is not firing on that cylinder. There could be a number of reasons for this but it will probably be an engine out job to fix. Gears and Gearbox Changing gear in a standard VW type 2 has often been compared to stirring a can of paint. Due to the long gear linkage mechanism and especially when parts are worn the gear change can become very imprecise. Generally VW bus owners get used to their vans gear change and it isn’t a problem however as soon as I got my van I had the gear lever changed for one of the after market quickchange short shift types that made it easy to change gear and also have a lever to pull up before van will go in reverse so you cannot select reverse by mistake. VW camper gearboxes are as far as I know very reliable but things to check are that all gears can be selected and when on a test drive make sure that it doesn’t jump out of gear by speeding up quickly and then taking foot of accelerator in each gear. Also on the test drive listen for any excessive noise or whining in each gear. Another test that will check the clutch and confirm that the van doesn’t jump out of gear is to put the handbrake on and with the engine running put van in first gear and slowly release the clutch. Assuming the handbrake works the van should stall. If you just hear the engine note getting higher then the clutch is slipping and will soon need repair and most likely replacement. If the van jumps out of gear it is quite likely that the gearbox will have to be repaired or replaced with a reconditioned one in the near future. Don’t forget to test reverse as well! Steering Take the van for a test drive and on a straight road hold the steering wheel lightly and make sure the van does not pull to one side. Steering wheel should be straight when van is moving in a straight line. Check there is no play in the steering by turning the steering wheel and making sure van responds immediately. Listen for any noises or clunks when turning the wheel. Look under van and visually inspect all steering components and check for excessive play. Also check all tyres looking for even tread wear. If the tyres are worn on the inside or outside there could be a problem with the wheel alignment, tracking or something more serious so get it checked by an expert. Brakes First of all do a visual inspection looking underneath behind each wheel. Look for any damp patches on drums or leaking brake fluid dripping onto floor. Inspect the brake pipes and check that they are routed properly with no corrosion or leaks. Whilst on a test drive build up a reasonable speed and after checking that there is nothing behind apply the brakes firmly. The van should stop smoothly without any judder and should stop in a straight line without pulling to one side. The standard brakes are not as efficient as a modern car but you will find that you adapt your driving to compensate for this ie: don’t get too close to the vehicle in front and slow down earlier when approaching junctions. Check the operation of the handbrake by parking on a steep hill and seeing if it will hold van (preferably when there is nothing behind!) or put the hand brake on and try and pull away and van should stall. Handbrake should take around 5 clicks until it is fully on. Suspension Find a car park and turn full lock one way do a couple of circles and then turn full lock the other way and repeat. Listen for any noises. Check the tread on all tyres and look for uneven tyre wear. Check the van is level and doesn’t lean to one side. Inspect shock absorbers for leaks.
Electrical General Check that the wiring has not been messed about with. If the wiring looks like it has been knitted by a previous owner (and it hasn’t been done properly) then it will probably cause annoying intermittent problems and make fault resolution difficult. The original wiring loom is made using standard colour codes so when there is a fault a wiring diagram can be used to trace the fault. If home made wiring is used the only person that knows which wire connects to what is the person that did it. Also if any accessories have been added try and check that they look that they have been wired in correctly and they have been fused in case of a fault. Lights and Indicators
Check that the side lights, head lights and full beam are all working. If full beam doesn’t work it is most likely a loose wire or a problem with the steering column switch that will need fixing to pass an MOT. Check that the indicators all work. Speedo, Clocks and Petrol Gauge
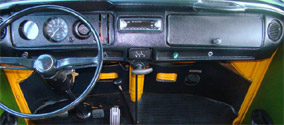
Check that Speedo is working and that needle is smooth and not jumping backwards and forwards. If the petrol gauge does not move at all or shoots up to full immediately it is most likely a wiring problem. If it moves but doesn’t show the correct level it is most likely a problem with the sender unit in the petrol tank. Horn Check the horn works as if it doesn’t it’s an MOT failure. Leisure Batteries and Split Charge Circuits
If you are going to be using accessories such as fridges, lights, radios when you are camping it is a good idea to have a leisure battery. It is wired in such a way that all your accessories run from it. When the engine is running the leisure battery is being charged and then when you switch the engine off and use your accessories they do not run down your main battery so that your camper van still starts in the morning. If the bus has a leisure battery it should be fused near the battery and then also have an auxiliary fuse box with a fuse for each accessory connected. Ask the seller to show you how it is connected and if you buy the bus get him to write down which accessories are connected to the leisure battery and via which fuse. If you don’t have this information it can be difficult to work out as you will have to follow wires that may run behind units and panels. It may also save you getting a flat main battery when camping as you may assume that an accessory works of the leisure battery and leave it on when camping only to find it runs of the main battery and the van wont start because it is now flat. For more information about leisure batteries CLICK HERE to visit my other site.
Bus Interior Seats
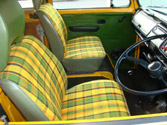
Check the drivers and passenger seats for rips and cigarette burns. Also check they can be adjusted (especially the drivers seat) so that you can drive in a comfortable position. If the seats are not the originals be careful to check the height as some people fit after-market seats that are higher than the originals. This is ok for some drivers but may make it awkward for the taller driver who will bang their knees on the steering wheel and their head on the roof ! Headlining
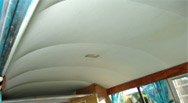
Can be difficult to replace and relatively expensive so have a quick look for rips or damage. If van has been owned by a smoker then it will most probably be stained and the stains are difficult to remove successfully. Windows
Check the windscreen for scratches, it is quite common if the wiper blades haven’t been renewed for the screen to have been scratched by the wiper arms. Also look for stone chips and cracks, if they are in the field of view then it is an MOT failure. If the van has sliding or louvre windows then check their operation and also that they fasten securely when closed. If the bus is a converted panel van then check for rust around the edges of the side windows. When the holes for the windows were cut out sometimes the metal edges were not treated. Water builds up behind the rubber seals and rust starts forming from the edge outwards. Lift the corners of the rubber seals to investigate properly. Standard Heating The heating system on the VW bay window is not renowned for being very efficient. Unfortunately the system has to get the warm air generated by the engine at the rear to the cab at the front. On a cold winter day a lot of the heat is lost before it gets inside in the van. The main components involved are called heat exchangers and if they are not working correctly then heating will be ineffective. The genuine original VW heat exchangers are more efficient than after market versions so be aware of that if heat isn’t forthcoming! Also the pipes that connect between the heat exchangers and the cab should not have leaks (normally at joints) or the hot air will disappear. The heat is turned on and off using the heater control levers with the red plastic tabs next to the speedo. After taking the van for a test drive leave the engine running and try switching the heating on and off and seeing if hot air comes out. There is a small hand operated lever (or foot operated if you are driving and have flexible legs!) low down at the front under the dash near the centre of the van that operates a flap to direct the air onto the screen or the floor. For more useful information on how the heating system should work and possible problems CLICK HERE to visit my other site. As well as the heating there are the air vents. When you look at the front of the van you can see the distinctive air vent holes. Behind these are flaps that are operated by the heating control lever (or levers on older vans) with the blue plastic tab near to the speedo inside the van. Operate the lever and get someone to stand outside looking through the air vents and they should be able to see the flaps opening and closing. After Market Heating
If the van has an after market heater such as Propex, Truma, Eberspacher or Webasto fitted then ask the seller to demonstrate it working. If the van has been imported from Germany sometimes these heaters are disconnected before the van is exported. For more information about after-market heaters CLICK HERE to visit my other site. If you buy the van and are in any doubt as to the safety of an after-market heater get it checked out by a qualified expert. Furniture
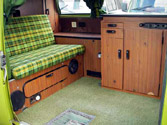
Check the camping interior furniture carefully. Open each cupboard door and check the hinges and handles are intact and work properly. It is common for handles to get broken and also for units to become damaged where the hinges fasten to them. If the units are made from chipboard then check it isn’t damaged especially on the rear faces where the edges touch the bodywork. It is here that it can get penetrated by damp and the chipboard expands and falls apart. Fridges
Depending on the model it may have only a cool box or on better versions a fridge. Some models have fridges that will work from 12 volts, LPG/Gas and 240v mains electricity. Ask the seller to demonstrate the fridge working. Note that as fridges generally have a high electrical consumption on some campers (eg Westfalia) the fridge only works on 12 volt if the engine is running. If the fridge works from LPG/gas then check that there is a vent to the outside at the rear of the fridge as this is required to remove dangerous fumes from the van when the fridge is on. Sinks and Cookers
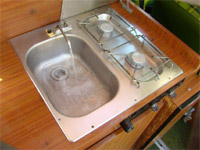
Check that the cooker functions correctly ie if it has two burners check they both light. Check that all pipes and shut off valves are in good condition. If you buy the van and are in any doubt as to the safety of the gas fittings get them checked out by a qualified expert. If the sink has an electric tap or foot pump check that it works. If the van has fresh water tanks and/or grey water tanks find out where they are, how they are filled and emptied and check that all connections are good.
Final Checks Assuming you have made all the above checks and you are still interested in buying the van then use any problems you have found to try and negotiate a price you and the seller are happy with. If you agree a price before handing over any money do a few final checks by checking any documentation the seller may have. Chassis Numbers And Documentation
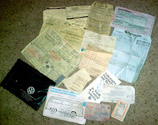
Firstly check the registration document. Check the registration on the document matches the registration plate on the van. If the van is being sold by a private seller check that the name and address matches the address where you are viewing the van. Don’t arrange to view a van at a meeting point other than the address on the document as the van could be stolen and the document forged. If you are viewing the van at a show or similar arrange to pay the owner at his home address so that you can be sure that the van is not stolen. Check that the chassis numbers on the registration document match the ones on the van. Check the engine numbers on the document match the ones on the engine (they may not always match as reconditioned engines have often been fitted and the details not updated) but is certainly a plus point if they do match. Then check that the number of previous owners matches what you had been told originally. For me the less owners the better as I think that the longer an owner has the van the more likely he is to look after it and service it etc. (However I have also heard people say that you always look after a vehicle for the first 12 months and then the novelty wears off suggesting that if it has a new owner every 12 months that would be a good thing.) I guess you have to make your own decision about that one! If the van is being sold by a private seller check how long he has had the vehicle. If he has only had it for a month or two you should question why he is selling it as it may be that it has a serious problem and he is now trying to offload it. Unless buying the van as a restoration project then I would try and insist the seller puts 12 Months MOT on the bus before handing over the full payment. MOT’s are not a guarantee that there are no problems with the bus but they can certainly highlight any issues and its better to let the seller sort them out than for you to have to do it at your expense after purchase. Also if buying from a dealer then ask if he provides a warranty. Make sure that if he agrees to provide a warranty that you get something in writing stating exactly what is and isn’t included. If a dealer has confidence in the vans he is selling I would expect him to provide at least some kind of warranty. Service history, receipts and photographs all help to show a van’s history so the more information available the better. MOT Information If previous MOTs are available it a good sign that previous owners looked after the van (if they cared enough to keep documents relating to its history) and they can be used to verify the mileage is genuine and how many miles it did each year. It is now also possible to check a vehicles MOT history back to circa 2005 online HERE. This will show you if the vehicle failed any MOT’s or had any advisories in previous MOTs and what they were. In order to check you need to know the vehicle registration number. Obviously when buying a vehicle it helps if you know what the requirements for the MOT test are. The actual MOT Testers Handbook is available online and is a useful source of reference. You can also get some information about a vehicle from DVLA by doing an online vehicle check HERE.
SCAM Warning Currently there are many convincing online SCAMS around trying to trick people that are looking to buy a camper van (and other vehicles) into paying money for a van that doesn’t exist. I could write a full book about all the different ways these scammers are operating but this is just a quick paragraph to say whatever the circumstances DO NOT send money to anyone via any method for a van that you haven’t seen in person at the owners house / motor dealers premises. Every day vans are being listed on sites such as Ebay / Gumtree / Preloved normally at prices that are below market value in an attempt to get you hooked. When you make contact you normally receive a text or email stating that the owner is out of the country, working on an oil rig, in the armed forces etc but if you send the money in advance they will have the van delivered to your door. They will have all kinds of stories about vehicle delivery companies and secure payment via bank transfer, escrow sites that supposedly are run by paypal / ebay etc but once you send the money you will never see it or the vehicle you supposedly bought again. These frauds are quite sophisticated now with fake company websites for car sales / vehicle delivery companies etc, fake paypal / ebay /escrow/ payment sites. The fraudsters know that you may check companies house so they may use valid company names etc but as I already said DO NOT send money to anyone that makes an excuse when you ask to come and see the vehicle in person as IT WILL be a SCAM. Conclusion I hope that you find this guide useful. Don’t be put off by the fact that it points out all the problems a Volkswagen bus can have. Hopefully by following the guide you wont get any nasty suprises after buying your van and can enjoy all the pleasures that VW bus ownership entails. Please feel free to email me if you have any information to add to the guide that will help other potential VW bus owners. I am also preparing guides for VW Splitscreen, VW T3 / T25 / Vanagon and VW T4 Transporter (Eurovan) so any useful information about these would also be appreciated. To get notifications when this website is updated subscribe to my VW Camper Blog or Follow Us on Facebook. If you find the site useful please consider making a small donation to help pay towards the site running and development costs by clicking the Paypal button on the left (You don’t need a Paypal account to make a donation) ;-) |
|||||||||||||||||||||||||||||||||||||||||||||||||||||||||||||||||||||||||||||||||
|
Please read the Disclaimer and Privacy and Cookie Policy before using this site. |
|||||||||||||||||||||||||||||||||||||||||||||||||||||||||||||||||||||||||||||||||
|
© Copyright 2007 - All rights reserved |
|||||||||||||||||||||||||||||||||||||||||||||||||||||||||||||||||||||||||||||||||


